Hosting your first Gimkit game can feel a little overwhelming. There are kits to choose from, game modes to understand, settings to configure, and students waiting to join. The good news? Once you understand the basic flow, Gimkit hosting becomes surprisingly straightforward.
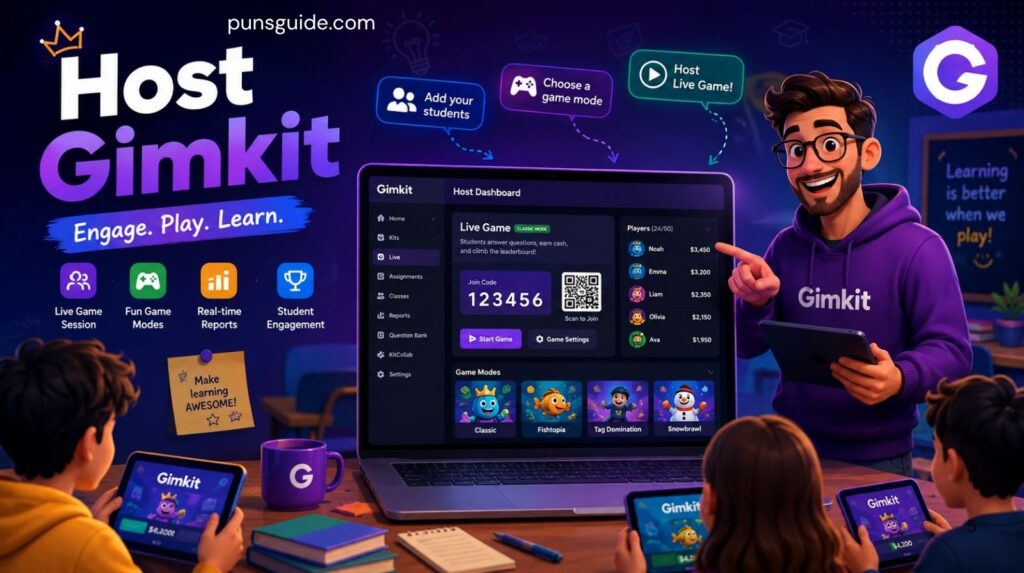
The entire process follows a simple path: choose your content, select a game mode, configure the session, share the joining information, and start playing. Gimkit’s current official hosting guide follows essentially this same workflow.
Whether you’re preparing a quick classroom review, testing students before an exam, or simply trying to make practice more interactive, this guide walks you through how to host Gimkit from start to finish.
What Does It Mean to Host a Gimkit Game?
A Gimkit host is the person who creates and controls a live game. In most classroom situations, that person is a teacher or educator. The host chooses the Gimkit kit, selects the game mode, controls important settings, and gives students the information they need to enter the session.
Think of the host as the person running the show. Students focus on answering questions and playing. The host focuses on making sure everything starts correctly and runs smoothly.
A live Gimkit game isn’t simply an online quiz. Gimkit combines questions with game mechanics, which can include competition, virtual rewards, exploration, teams, or other objectives depending on the mode. That combination is what makes it useful as an educational game rather than just another digital worksheet.
What You Need Before You Host Gimkit
Before launching your first Gimkit session, get the basics ready. You’ll need an educator account, a kit to play, and a device with a reliable internet connection. Your students will also need internet-connected devices to participate.
Most importantly, don’t wait until the class is sitting in front of you to discover that your questions need editing. Spend a few minutes reviewing your question set first. A polished kit makes the actual hosting process much easier.
Gimkit currently says that an account is required to create kits and host games. New accounts can be created for free, and new Educator accounts currently receive a 14-day Gimkit Pro trial. Student accounts are optional.
How to Create a Gimkit Educator Account
Creating an Educator account is the first real step if you’re new to the platform. Gimkit currently allows educators to create an account using Google or email. During setup, you’ll identify yourself as an Educator rather than a Student.
Once the account is ready, you’ll have access to your Gimkit dashboard. This is your control center for creating and managing kits, starting games, organizing classes, and accessing other teacher tools.
It’s worth taking a minute to explore the dashboard before your first lesson. Knowing where your kits and hosting controls are can save valuable classroom time later.
Can You Host Gimkit Without Login?
This is one of the most common questions from first-time users. If you’re asking whether you can host Gimkit without an account, the current answer is no. Gimkit states that you need an account to create kits and host games.
That requirement applies to the host, not necessarily to every student. Students can participate without needing the same type of educator setup. When you use a Class, for example, students can join live games through the class workflow.
So, don’t confuse Gimkit host access with Gimkit join access. The teacher needs an account to run the session. Students primarily need a way to enter the game.
How to Create Your First Gimkit Kit
A Gimkit kit is the content that powers your game. In simple terms, it’s your collection of questions and answers. You can build one around vocabulary, science concepts, history facts, math practice, exam review, or almost any other subject.
To create one from scratch, Gimkit’s current process starts from the New Kit button on your dashboard. You enter basic information such as the kit name, language, and subject. Then you add your questions and answer choices.
The question editor also lets you identify correct answers and add media where supported. Gimkit notes that some media features, such as audio questions, are available to paid members.
Build a Question Set That Actually Helps Students
A strong question bank shouldn’t feel like a random pile of facts. Every question should support something you want students to remember, understand, or apply.
For example, a vocabulary kit might begin with straightforward multiple choice questions. Later questions could ask students to use a word in context. That small change turns simple recall into deeper practice.
You can also use different question types where supported by your kit setup. Depending on the content and available features, you might work with multiple-choice formats, true-or-false questions, or other response formats. Always check the current editor before planning a lesson around a specific question type.
Can You Use an Existing Gimkit Kit?
Absolutely. Creating every question yourself isn’t always the best use of your afternoon. Gimkit provides kit and question discovery tools that can help you find existing material.
You can also copy a kit you have access to and then edit the copy. Gimkit’s current instructions allow you to open a kit, select Copy, and modify the resulting version.
That approach works especially well when you find a useful Gimkit kit that needs a few changes for your class. Instead of rebuilding the entire thing, you can tailor what already exists.
Also Read: Erikkapost.com: Your Daily Hub for Fresh Content in 2026
How to Host a Gimkit Game Step by Step
Now comes the part most readers actually want: how to host a Gimkit game.
The current process is refreshingly simple. Gimkit’s official instructions break live hosting into five core actions: select a kit, select a game mode, configure game options, share the game code or link, and start the game.
Step 1: Log In to Gimkit
Start by signing into your educator account. From your Gimkit dashboard, locate the kit you want to use.
You don’t need to build a new kit every time. If you’ve already prepared one for a previous lesson, simply open that kit and use it again. This is one of the biggest time-savers once you begin using Gimkit regularly.
Step 2: Select Your Gimkit Kit
Choose the kit that matches the lesson you’re teaching. Before clicking Play Live, quickly scan the questions.
Look for outdated information, duplicate questions, confusing answer choices, or answers that might be interpreted in more than one way. Five minutes of preparation here can prevent ten minutes of confusion later.
Step 3: Click Play Live
Gimkit currently provides a green Play Live button beside kits on the dashboard. You can also open a kit and select Play Live from inside it.
This opens the Mode Picker, where you can browse the available Gimkit game modes. Each mode offers a different gameplay experience, so don’t automatically pick the first option you see.
Step 4: Choose a Game Mode
The best mode depends on your learning goal and your students. Gimkit’s Mode Picker provides descriptions and labels to help hosts understand the style of each available mode.
If you’re running a quick classroom review, a straightforward mode may be enough. If you want more exploration or strategy, a 2D mode may offer a richer experience.
Step 5: Configure Your Game Settings
After selecting a mode, you’ll move to the game settings screen. This is where the session starts becoming yours.
Gimkit explains that game options include standard and mode-specific settings. Depending on the selected mode, these can include goals, class connections, late joining, nickname settings, and other gameplay controls.
Don’t change settings simply because they’re available. Ask a more useful question: Will this setting improve the learning experience for this particular group?
Step 6: Open the Game Lobby
After your settings are ready, continue to create the game. Gimkit opens a game lobby containing the information students need to join.
The lobby gives everyone a moment to get connected before the actual live game session begins. It’s also your chance to check player names and remove inappropriate names before starting.
Step 7: Share the Gimkit Join Code
Students can join using the Gimkit join code, a join link, or a QR code. Gimkit’s current hosting instructions explain that hovering over the game code displays the QR code.
If your classroom has a projector, displaying the code or QR code can make the process much smoother. Students can join while you circulate around the room helping anyone who gets stuck.
Step 8: Start the Game
Once everyone is ready, select Start Game. Students move from the lobby into the actual game.
At this point, your job changes. You’re no longer preparing the session. You’re managing it.
How Students Join a Gimkit Game
The Gimkit join process is designed to be simple. Students can use the joining information displayed by the host, including the game code, QR code, or link. Without Classes, Gimkit directs students to its join page to enter the game code.
If you’re using Gimkit Classes, the experience can be even smoother because students can join live games through their class setup. Gimkit says students using Classes join live games automatically, with their class name appearing on the leaderboard.
This distinction matters. The host creates the experience. The student simply enters it.
| Host | Student |
|---|---|
| Selects the kit | Joins the game |
| Chooses the mode | Answers questions |
| Configures settings | Plays the game |
| Starts the session | Participates |
| Monitors gameplay | Works toward the game objective |
| Reviews reports | Receives the learning experience |
Choosing the Right Gimkit Game Mode
Picking a Gimkit game mode shouldn’t be an afterthought. The mode changes how students interact with your questions.
Gimkit itself recommends using the Mode Picker to explore available modes and read their descriptions and labels. Those labels can help you choose an experience that fits your class and desired outcome.
For example, a quick review before a test may benefit from a focused competitive experience. A longer activity might work better with exploration, teamwork, or strategy.
Also Read: TheSindi.com: Complete Guide to Features, Content, and User Experience in 2026
Classic Mode
Classic Mode is the kind of format many teachers picture when they first think about a Gimkit game. Students answer questions while gameplay mechanics create competition and progression.
It’s a natural choice when your primary goal is classroom review. You don’t need an elaborate lesson structure around it. Prepare solid questions, explain the objective, and let the game reinforce the material.
Fishtopia
Fishtopia takes a very different approach. Rather than making the experience feel like a conventional quiz race, the mode wraps question answering into a fishing-oriented game environment.
It’s a useful reminder that Gimkit doesn’t have to feel like a test. Sometimes changing the environment is enough to make familiar review material feel fresh.
Tag Domination
Tag Domination adds a more competitive, movement-focused style of gameplay. In 2D modes, Gimkit lets hosts adjust the balance between answering questions and gameplay.
For example, Gimkit explains that hosts can control how much energy students receive from correct answers in Tag: Domination.
That balance matters. If gameplay becomes too dominant, students may start thinking more about the game than the questions. Adjusting the balance can keep student learning at the center.
Snowbrawl
Snowbrawl is another 2D experience built around fast interaction. Players use snowballs as part of the gameplay, while correct answers contribute to their in-game resources.
Gimkit specifically allows hosts to adjust how many snowballs players earn for correct answers. That means the host has some control over how strongly academic performance influences gameplay.
What Are Gimkit 2D Game Modes?
2D game modes put students into explorable game worlds with Gim characters. They can feel much more like a small multiplayer game than a traditional quiz.
According to Gimkit, 2D modes can be more complex and strategic than traditional modes. They can also include gameplay systems that make answering questions part of a larger objective.
The important point is that questions still matter. In several 2D modes, correct answers provide resources that help students progress through the game.
Why 2D Modes Can Work Well in Class
The strength of a 2D mode is its ability to make repetition feel less repetitive. Students may answer many questions without experiencing the activity as a conventional drill.
Gimkit also notes that cosmetics are earned and used in 2D modes. Students can earn XP and use it toward cosmetic items.
That extra layer can boost student engagement, especially when students already enjoy game-based environments.
Understanding Gimkit Game Settings
The game settings deserve more attention than they usually get. They determine how the session behaves, and small choices can make a noticeable difference.
Gimkit’s standard options can include a game goal, connecting a class, allowing students to join late, and using the Nickname Generator. Additional options depend on the selected mode.
For example, late joining can be helpful when a student arrives a few minutes late. However, Gimkit notes that hosts dealing with game crashers may want to turn late joining off.
Keep the Learning-to-Gameplay Balance Right
In 2D modes, Gimkit provides additional controls for balancing question answering with gameplay. A host can increase or decrease the rewards students receive for correct answers depending on the mode.
This is one of the most useful hosting ideas to understand. The game should support the lesson rather than swallow it whole.
How to Manage a Live Gimkit Game
Once your gimkit host live session begins, keep an eye on the host controls. Your screen gives you tools for monitoring players, viewing the leaderboard, managing the game, and ending the session.
In 2D games, the host can participate as a player or spectate, depending on the setup. Gimkit also provides controls for viewing players and spectating them.
You don’t need to stare at the dashboard every second. Instead, watch for problems, check participation, and step in when the session needs direction.
Monitor Players and the Leaderboard
The game leaderboard provides a quick snapshot of progress. It can help you spot students who are struggling, racing ahead, or disengaging.
Don’t turn the leaderboard into the entire lesson, though. Competition can motivate some students while making others uncomfortable. Use it as feedback, not as the sole measure of success.
Remove Problematic Players
Gimkit allows hosts to remove players from live games. This can be useful if someone joins who shouldn’t be there or uses an inappropriate display name.
It’s better to deal with the issue quickly than allow it to derail the entire class. A calm intervention usually takes seconds.
End the Game Early When Necessary
Sometimes the best hosting decision is knowing when to stop. Gimkit provides an End Game control for ending a live game early.
Maybe students have already demonstrated mastery. Maybe the class needs to move on. A good host doesn’t let the timer dictate the lesson.
What Is the Gimkit Player Limit?
The current Gimkit Help Center states that the hard limit for a live game is 500 students, while 2D game modes have a separate hard limit of 60 students.
However, maximum capacity isn’t the same thing as ideal classroom performance. Your network, devices, and connection quality still matter.
For an ordinary classroom, the practical question isn’t usually “Can Gimkit technically support everyone?” It’s “Can every device maintain a stable connection while everyone plays?”
How to Review Gimkit Game Reports
The game shouldn’t end when students stop playing. That’s when the useful academic information begins.
After you host a kit that you own, Gimkit provides game reports with class and individual data. Current reports include Student Overview, General Overview, and Question Breakdown views.
You can open the report immediately after the game or return to previous reports later from the Reports area of your dashboard. Gimkit also allows reports to be saved as PDFs.
Also Read: Glossywise Com Review 2026: Is It Worth It? An Honest Look at the Website, Content, and Credibility
Use Player Results to Find Learning Gaps
Look beyond the final winner. The more useful question is: Which concepts did students miss?
Suppose 80% of the class misses the same science question. That’s not simply a low score. It’s a teaching signal.
You may need to reteach that concept, provide another example, or create a short review game that focuses specifically on the weak area.
Use Question Breakdowns
The question-level view can show where your question set worked and where it didn’t.
If nearly everyone misses one question, inspect the wording. The problem may not be student knowledge. It could be an ambiguous answer choice or an unnecessarily tricky question.
That’s why game analytics are most useful when combined with teacher judgment.
Gimkit Basic vs. Gimkit Pro
Gimkit currently calls its free version Gimkit Basic. According to Gimkit’s current Pro FAQ, Basic lets educators host games, create classes, and collect reports. However, the free plan limits access to the full game-mode catalog.
Gimkit Pro provides unrestricted access to game modes and adds features such as Assignments. Gimkit also says Pro allows educators to upload images and add audio to questions.
The practical takeaway is simple: you don’t need Pro just to learn how to host a Gimkit game. Basic can handle core live hosting. Pro becomes more relevant when you need additional modes or advanced features.
Are Gimkit Assignments the Same as Live Games?
Not quite. A live game happens with students playing together in real time. Gimkit assignments are designed for students to play independently.
Gimkit currently lists Assignments as a Pro feature. They can be used for homework, distance learning, or independent study, with supported modes and settings.
So if you’re teaching a room full of students and want everyone playing simultaneously, use live hosting. If you want students to complete work independently, Assignments may be the better fit.
How Gimkit Classes Can Make Hosting Easier
Gimkit Classes are useful when you regularly teach the same group. Instead of treating every live session as a completely separate event, you can connect your students to a class.
Gimkit’s current documentation says students using Classes can join live games automatically, and their class names appear on the leaderboard.
Classes also make repeated classroom activities easier to organize. Once your roster is established, you can spend less time on administrative setup and more time on the actual lesson.
How KitCollab Can Help You Build Better Kits
KitCollab adds a collaborative twist to content creation. Instead of writing every question yourself, you can allow other people to submit questions to your kit.
Gimkit says KitCollab can work in real time or asynchronously with students, teachers, or both. Submitted questions aren’t automatically thrown into your kit; the host approves them first.
That approval step is important. It means students can contribute ideas while the educator still controls the final question bank.
Best Tips for Your First Gimkit Session
Your first game doesn’t need to be elaborate. In fact, simpler is usually better.
Start with a kit you understand, choose a mode that matches your lesson, and keep the first Gimkit session manageable. Once you’ve hosted a few games, experiment with more advanced settings and 2D experiences.
Test Your Kit Before Class
Use Gimkit’s Practice Mode to preview the questions and answers in a kit. Gimkit describes Practice Mode as a simple way to review kit content without the normal game mechanics.
This is especially useful for catching mistakes. You don’t want your first discovery that an answer is wrong to happen in front of 30 students.
Keep the Game Focused
Long games aren’t automatically better. If students are tired, extending the timer won’t magically create engagement.
A shorter game followed by discussion can often produce more value than one giant session. Use the game to create energy, then use the results to drive the next teaching move.
Mix Question Difficulty
A good question set should have some easy wins and some meaningful challenges.
If every question is difficult, students can feel stuck. If every question is obvious, the game becomes little more than clicking through material they already know.
Aim for a useful progression. Let students build confidence before you ask them to stretch.
Rotate Game Modes
Using the same mode every day can make even a fun platform feel predictable.
Try a straightforward format for quick classroom review, then occasionally switch to a 2D mode when the lesson benefits from more exploration or interaction. Gimkit’s own Mode Picker is designed to help educators choose based on the type of experience they want.
Use the Results to Plan the Next Lesson
This is perhaps the most valuable hosting habit.
Don’t treat game reports as a scoreboard. Treat them as evidence. If students consistently miss one concept, that’s information you can use.
A five-minute review based on actual mistakes can be far more effective than another generic worksheet.
Common Gimkit Hosting Mistakes to Avoid
The first mistake is launching a game without checking the kit. A single incorrect answer can create confusion for the entire class, especially when students assume the platform must be right.
Another common mistake is choosing a mode because it looks entertaining rather than because it fits the lesson. A spectacular game can still be the wrong tool for a ten-minute vocabulary review.
Hosts also sometimes overuse competition. A game leaderboard can create excitement, but learning isn’t always about finishing first. Some students need collaboration, repetition, or quiet practice more than another race.
Finally, don’t assume every Gimkit mode works exactly the same way. Game options vary by mode, and 2D games have their own mechanics and controls.
A Quick Host Gimkit Checklist
Before class begins, run through this short checklist:
- Choose your Gimkit kit
- Review the questions and answers
- Open Play Live
- Select the game mode
- Check the game settings
- Decide whether late joining should be enabled
- Open the game lobby
- Display the Gimkit join code or QR code
- Wait for students to join
- Check player names
- Start the game
- Monitor the session
- Review the game report afterward
It looks like a lot when written as a list. In practice, the workflow becomes familiar very quickly.
The biggest time-saver is preparation. Once your kits are organized, your account is ready, and your students know how to join, launching a live Gimkit game takes only a few steps.
FAQs
Can you host Gimkit for free?
Yes. Gimkit currently offers Gimkit Basic, its free version. Basic supports core educator functions such as hosting games, creating classes, and collecting game reports, although access to game modes is more limited than with Pro.
New educator accounts currently receive a 14-day Gimkit Pro trial before the free Basic experience continues.
Do you need a Gimkit account to host?
Yes. Gimkit states that an account is required to create kits and host games. Educator accounts are free to create.
Students don’t necessarily need the same account setup to participate in your live game.
How do you host a live Gimkit game?
Choose a kit from your dashboard, click Play Live, select a game mode, configure the available options, share the game code or joining link, and start the game. That’s the official basic workflow.
How do students join a Gimkit game?
Students can use the Gimkit join code, QR code, or game link provided by the host. When Classes aren’t being used, students can visit Gimkit’s join page and enter the game code.
What is the Gimkit player limit?
Gimkit currently lists a hard limit of 500 students for live games and 60 students for 2D game modes.
Actual classroom performance can still depend on the quality and stability of the devices and network being used.
What happens after a Gimkit game ends?
For kits you own, Gimkit provides game reports containing class and individual data. Current reports include student, general, and question-level views. You can access them immediately after the game or later through the Reports section.
Is Gimkit Pro required to host games?
No. Gimkit Basic allows educators to host games and collect reports. Pro mainly expands access to game modes and adds additional features such as Assignments.
Can you use Gimkit for homework?
Yes, but the feature to create Gimkit Assignments is currently part of Pro. Assignments let students play independently rather than participating in the same live game.
What is the best Gimkit game mode?
There isn’t one universal winner. The best choice depends on your goal, class, available time, and preferred level of competition.
For a simple classroom review, start with a mode that’s easy to explain. For more interactive learning, explore the 2D options and use the Mode Picker descriptions to find a suitable fit.
Final Thoughts: Make Your First Gimkit Game Count
Learning to host Gimkit doesn’t require a technical background. Once you know where the kit, Mode Picker, game settings, lobby, and host controls fit into the process, the whole experience becomes much easier.
The real skill isn’t clicking Start Game. It’s knowing why you’re starting that particular game, with that particular question set, for that particular group of students.
Use your kit to reinforce the lesson. Choose a mode that supports the goal. Keep the session focused. Then look at the game reports after everyone finishes.
That’s where Gimkit becomes more than an entertaining online quiz game. Used thoughtfully, it becomes a practical tool for interactive learning, classroom review, student participation, and targeted reteaching.
For the latest hosting instructions, game-mode availability, account requirements, and plan details, check Gimkit’s official Help Center before your next session. Gimkit’s interface and available features can change over time, so current documentation is the safest source for exact button names and plan-specific details.

Jhon AJS, the creative mind behind Puns Guide, is an experienced blogger with a knack for wordplay and witty humor. Passionate about blending laughter with language, he crafts engaging pun filled content that entertains and inspires readers. With years of blogging expertise, Jhon continues to share clever insights, making every visit to Puns Guide a fun and refreshing experience.